Friday, March 27, 2015

Rugs for the Kitchen: Part 1

I have been trying to find a new rug for my kitchen for quite some time.  My kitchen colors are really neutral and I like that, but this time of year with the coming of spring and spring cleaning I was hoping to freshen things up and infuse some punches of color into the space.  However, I have been having a hard time deciding what kind of rug works well in a kitchen.

Here is some inspiration I have found:

I like the look of this ethnic looking design with the wood cabinets and dark countertops.

via


This bright rug looks awesome with the minty green cabinets and farmers sink.

via

I love how these striped runners add subtle color in an otherwise neutral kitchen.

via

 This rug looks great with the stainless steel.

via

Love this rug with the white cabinets.  I sort of wish my cabinets were white!

via

This kitchen has a similar countertop to my kitchen but my cabinets are much lighter color.  This colorful floral rug really adds some fun.

via

This rug is pretty traditional yet adds a cozy feeling to this white kitchen.

via

I love the look of this navy and white rug, which looks great with the wood floor, white cabinets, and black hardware.

via

I don't particularly like the "fanciness" of this kitchen, but I love the rug.

via


I plan to do some rug shopping soon so I will be back next week to show you what I come up with!  I also plan to finish both my sitting area and dining room this weekend, so I will be back with the final photos of those spaces next week as well!

Monday, March 23, 2015

Command Center Clean up


I am a huge fan of the "drop zone - command center" idea and have always had one (even before it was a term I guess).  However, no matter how much I try it still gets neglected and cluttered.  Between mail and school papers and electronics it's hard to keep up.

So, I set out to clean up the area.  I wanted to keep it simple and not make any major changes because everyone uses this spot and, believe it or not, it's already set up in a way that makes sense.  But, it did need some love on the organizing and de-cluttering front.

It's a small space just as you walk in the kitchen door from our mudroom.  It consists of some old wooden boxes on the wall, and old red cabinet, a few small cigar boxes for holding various items, and some things clipped to the wall.

Here is what it looked like:


Not horrible, but not neat and tidy either.


The biggest clutter problem was mail and random things that needed to make their way to another location.


Inside the cabinet we keep cords, magazines, our budget binder, papers that need to be filed, etc.


We also have an old cash register in this area on our counter that we use to hold pencils, pens, notepaper and stamps (and I guess the random egg of silly putty!)


The first thing I did was empty everything out.  Okay...deep breath.


I started with new baskets for the inside of the cabinet.  I found these cheap, matching baskets at the local dollar store, and I decided to make some chalkboard labels for them.  See this post for the DIY.


I organized everything into the proper baskets, with the proper labels.  That made a huge difference already.


After cleaning the cash register drawer, I added some scrapbook paper.  Then I went through all the pens and got rid of the ones that didn't work and just neatened everything up.


I added a cute framed burlap bulletin board from Home Goods that I used to put the current calendar month printed from my computer.  (This works great for us as opposed to a regular calendar because we send all of our events from our phones to our calendar anyway, so it saves me having to transfer them to the calendar a second time).

I also made the clip board look a little cuter with some scrapbook paper and mod-podge. The clipboard holds our meal planner and grocery list.  

And, the best thing I added was a wall file from Ikea.  It has a slot for each person in our family for mail and school papers, plus one extra slot. I guess I could have labeled the slots, but I figured it could just go oldest to youngest and that would be easy to keep straight.


The oval shaker box holds receipts that I clean out at the end of the year.  The boxes on the wall are where we put outgoing mail or bills, and the small cigar boxes hold business cards, gift cards, sunglasses, etc.


The picnic basket holds my everyday bag and anything that needs to be returned or magazines that I save for my friend.  The big glass jug holds coins (when it's full it can be enough to go out to dinner!)


Small changes in this area made a big difference for us.  It rarely gets super cluttered anymore and when it does it's really quick to put things where they belong because everything has a place.

Here's the before and after:


Not a major huge difference when you look at it, but it is a big difference in the day to day function of that space. It's the little things that make a big difference and you don't have to spend a lot or do a complete overhaul to make it work more efficiently.

The total cost was:

$16. baskets
$7. bulletin board
$4. spray paint for chalkboard labels
$2. for brass fasteners for chalkboard labels
___
$29. total
Everything else I had on hand.


Thursday, March 19, 2015

Do over

Sometimes you just need a "do over." The last few months have been one of those times for me. The long cold northern winters seem to really throw me off course.

I had a plan to accomplish a bunch of projects around the house and de-clutter everything, all while getting fit and focusing on my health at the same time.

So, in the spirit of keeping it real...I have had some major FAILS in the last few months.

Here are just a few:

*After working on an update/room makeover to our sitting room since November, I decided on a whim to switch our sitting room and dining room altogether and even though I love the change, it changed our plan a little bit, so neither space has yet to be finished!  When they are I will post photos.

Here's a peak at the new dining room that was a sitting room.


*My projects have been very slow going and although I have TONS of ideas every single day I rarely ever get much done.  It seems like I have a bunch of things started but nothing finished. (It may have something to do with the amount of energy required to entertain a certain 3 year old, but that will only be the case for so long so I plan to relish it while it lasts).

Partially woven shaker rocker that was one of my Christmas presents (it did have to be put together so that took a while too).


*I have only lost two pounds since February! Ugh. Not. Good.  Well, actually I lost five, but gained three back....ooops.  Kind of the way my life goes....one step forward two steps back.

I think I need to make a list of priorities and just try to get one thing DONE before moving on to another (I am kind of crazy like that and have a hard time focusing.)  Because one thing I know for sure: Spring is coming (finally!!) and the outdoor projects and lawn mowing and gardening with be the only things we will be working on for a while.

And now I think am going to go order this light fixture, so we can finish our dining room that was once a sitting room.


Thursday, March 12, 2015

Sky in the country

I live in the country and I grew up in the country....and I mean really rural farm country.  I am drawn to open space like a moth is drawn to a flame.  I have lived in the city and the suburbs, and they too have their advantages.  However, there is some kind of mysterious quiet history in the air and soil of the open land that seems to call to me with unspoken words.  I have never been one to like living too close to anyone else.  I guess it's like being a hermit in some ways, because open space affords a sense of privacy and quietude.

Besides if I didn't live in the rural country I would never be able to see these beautiful views:


Late winter sunset.


Migration.
Fog and the old Oak across from my house.

Spring rainbow.
This was the field across the road.  It was wheat and corn with a trail in between.  It made a wonderful place to take a walk in the summer.

This photo shows our farmhouse from the middle of the corn field across the road.

Moon rise from my porch.

This is a photo of Lake Ontario from the road around the corner.  I love how the lake in the background looks higher than the street and the bridge.

Looking out from my driveway this fall...there was a double rainbow, although it was gone by the time I took this photo.

Sunset from my back yard.

Wednesday, March 11, 2015

DIY chalkboard labels from Mason jar lids


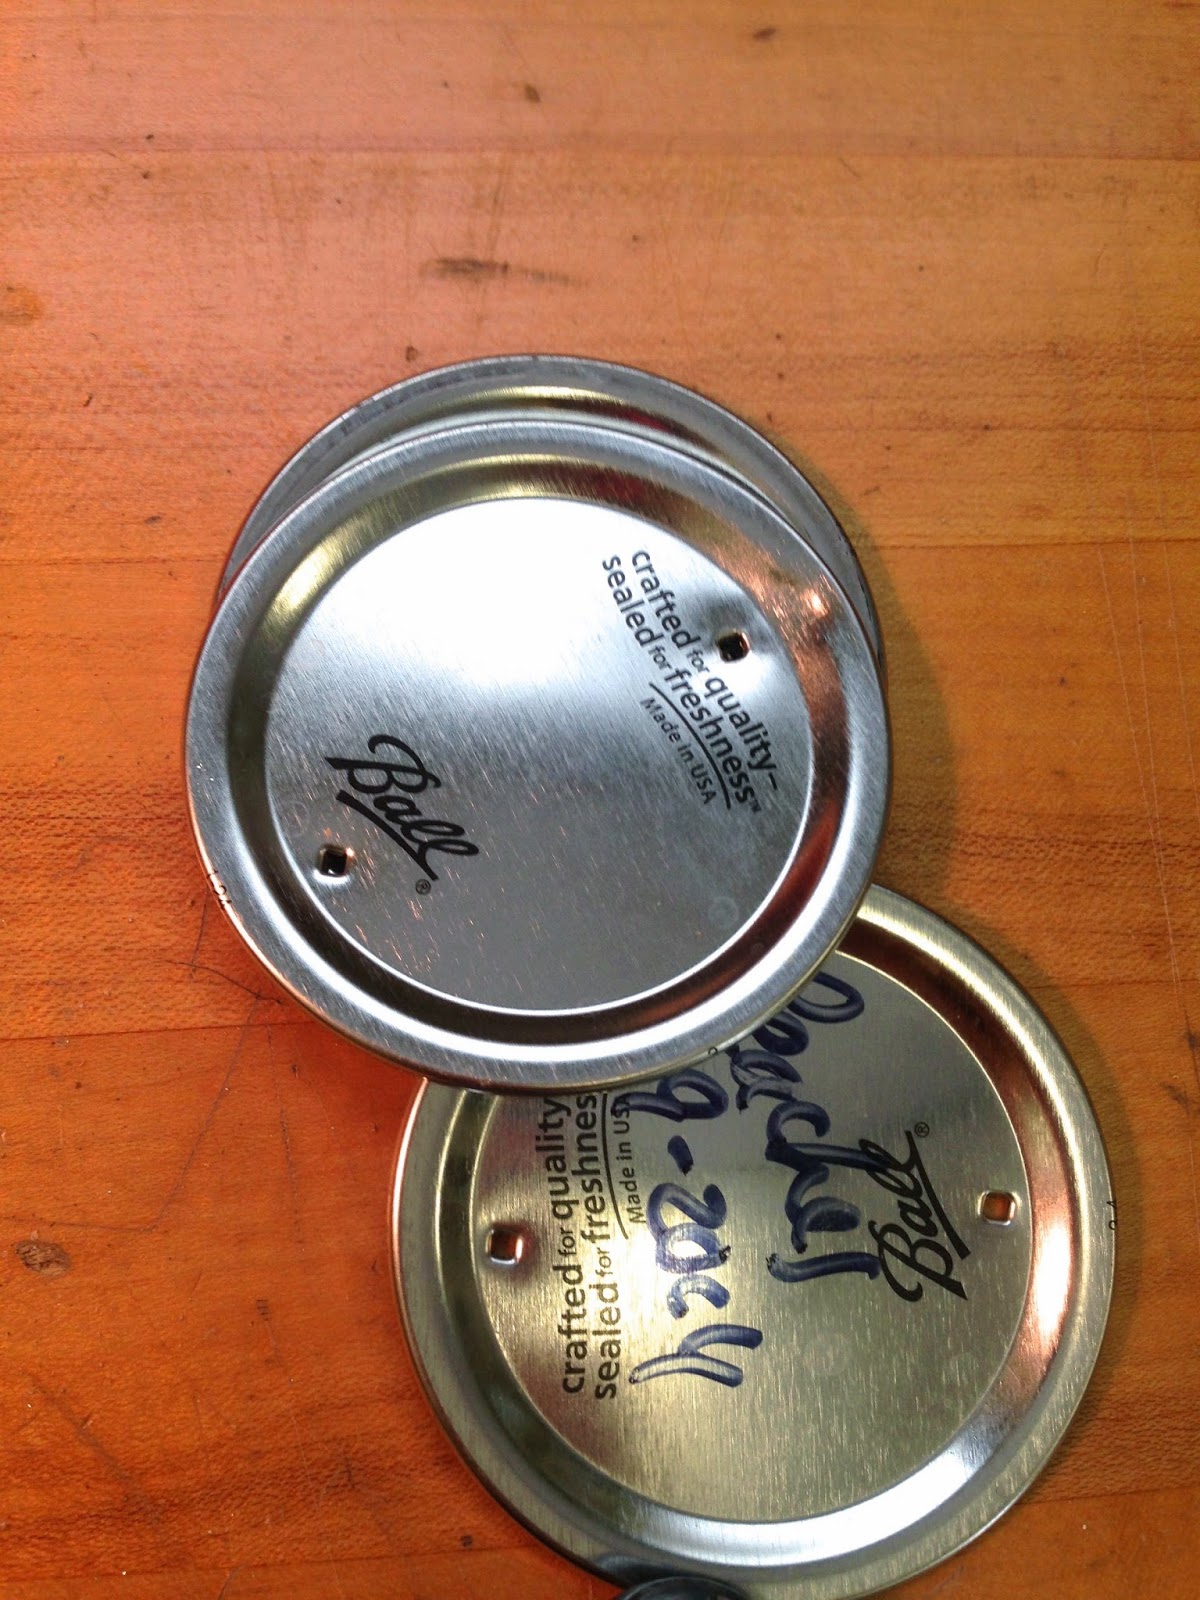
I have tons of mason jar lids laying around here from food that we canned and I am always trying to think of ways to reuse them instead of just throwing them in the recycling bin (since the lids are a one time use thing).  One of the ideas I came up with recently was to use them for basket labels.

Here's what I did:

I gathered a few used lids.  Then, with a large nail and hammer I put a hole in each side (like East and West if the lid were a compass).


Next, I used Rustoleum chalkboard spray paint and sprayed a coat on all of the lids.  I probably should have used primer or sprayed a second coat, because some of them ended up chipping a bit on the edges but I didn't (next time I will!)


Here's what they looked like after one coat of paint:


I wanted to use a water clean up Bistro Chalk marker instead of regular chalk because I didn't want it to rub off too easily, but I am sure you could use plain old chalk too.  You can find these markers at any craft store.


I found some brass fasteners (sometimes called "brads") in the office supply section of Walmart and I thought they would be great to hold the labels onto the baskets I had. 


So, I just pushed a fastener through each hole in the lid and into the space between the strips of the basket.  It worked pretty well because the baskets I chose were woven with sort of a paper strip material.  I do think it might work for a wicker basket too, or you could use string to attach it instead.  This is what they looked like from the inside of the basket.


And here's what the finished lid label looked like:


This was a pretty quick project and I liked that I was using something that would otherwise end up in the bin!

Related Posts Plugin for WordPress, Blogger...