Tuesday, May 26, 2015

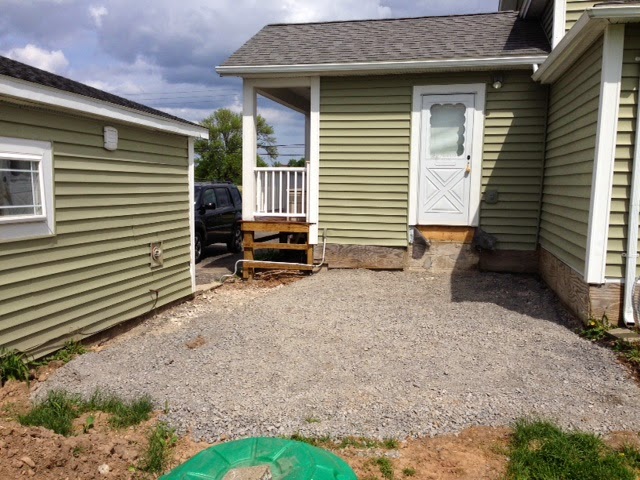
Our patio is gone!

Last week the guys came with the bobcat and jack hammer and demo-ed our cracked patio.


That big jack hammer made pretty quick work of our patio even though it was almost 10 inches thick.

Our mason brought his dog "Mud" and he and Otis had fun playing all day and watching the progress.


Once they were done, they brought the dump truck in and removed all the concrete rubble.


By the end of the day Mud was pretty tired out, but Otis was still running around.


They brought in a layer of stone and leveled it out.


At this point we are left with a crushed stone "pad"... and we are trying to decide what to do next.  Patio vs. deck? 


Tuesday, May 5, 2015

Demolition!!

We have been wanting to take our boring concrete patio out and do something different since we moved in (6 years ago), but haven't had the time or money.  This year with the extra cold winter we had the patio cracked beyond repair and heaved causing our foundation to crack.  Bad news.  But, the good news is now it is a priority to get the patio out and make a whole new backyard space!

This is what we are dealing with:

We had already removed all of the lilies from around the patio when this picture was taken.


The guys are supposed to come this week and jack hammer the patio out and start the repairs to the foundation and in order for them to do that we had to remove the stone facing from around our porch.

I actually started before Ken got home from work and it wasn't really that hard to get off.  I love the demolition process...it's great stress relief!


When Ken got home I decided to let him get some stress relief too.


It only took about an hour total to remove all the stone facing, and we were happy to find a usable porch framework to work with.


Once the repairs are done to the foundation we hope to redo the porch to what it would have looked like in 1880 (even though the original porches were much smaller) and we will also replace the decking with something more weather resistant since it gets water sitting on it and has rotted in quite a few places.

This is what I am thinking as far as the spaces between the posts:

via

I believe between the patio and the porches this might be an all summer project for us so I will post updates when things really get rolling, and I plan on posts updating our mudroom situation and other projects we have been working on indoors too.

Wednesday, April 29, 2015

This is REAL life...

I am taking a break from house stuff lately because we have been doing just too much.  Anyway, for the sake of keeping it real I want to talk about my experience with being a stay at home (sometimes working at home) mom.  

About 11 years ago, when I was in graduate school at the Rhode Island School of Design I spent a lot of time thinking about what I hoped my life would be like once all my schooling was over. I had this idea that once I was done and had my MFA degree I would set up a studio in RI and spend my time designing and coming up with new ideas and creating new pieces and teaching all while socializing with my artist friends and being truly happy.  That is the life I pictured for myself for so many years.

The reality is this: Once I got done with grad school, needing to earn a paycheck (since my husband was still in school) I went to work for a costume jewelry company.  It was interesting work.  I got to draw a lot and design and I earned a good living, but the dreamer in me knew it wasn't enough.  I wanted to use my own brilliant, creative ideas for me - not for someone else to make a lot of money off of.  

So, once I was pregnant with my first child (8 years ago now) I decided to leave my job.  I never really thought I would stay home for the duration, just for the first year or so.  What no one told me was that once you are home it is very very difficult to go back. So, I did freelance work for a while until we moved back to NY.  For a time, I really thought I could be a mom and have a studio and make art and my kids would be happy to play in a corner of the studio outfitted with toys and life would be just grand.  DOH!!  I mean really who is doing that????!!! I need to know so I can come and see if you are a real person or are secretly an alien programmed to function without stress and anxiety.  

Fast forward to my life now.  For the last few years, I have been home with my second child.  I take on custom jewelry projects here and there, but its not nearly enough to even give me spending money. And it's really stressful because I have to try and figure out when I am actually going to have the time to get the work done.  

I occupy my creative brain by thinking about house projects and gardening and design all while honestly being really depressed that I can't give my creative endeavors the nurturing they need to grow.  I know some people say that they can do it all (run a creative business while having young kids at home), but I can't for the life of me understand how?!  

I was talking to another artist friend today who chose basically the same path as me, and even though her kids are grown enough to be in school all day she echoed what I feel.  Moms have it hard.  I think if I could do it all over I would have stayed at my job at least for a while longer.  I admire my friends who are working moms.  I know it can be very hard for them too to be away from their kids all day, but I think in the end if mom is happy it's better for everyone.  

So, why such a negative post?  Well, all we see these days on blogs, FB, Pinterest, Instagram, etc, is how happy everyone is, and how perfect their house is, and how wonderful their life.  That is NOT real life.  Real life is sometimes sad days, dirty dishes, screaming kids, dogs who decide to puke when you are expecting company, and dinners of mac and cheese from a box.  That is reality for more people than what we often see on social media.  

What can we do about it?  I am not really sure, but just writing this post makes me feel better.  I hope to read more posts about people keeping it real and then maybe our own reality and the pile of dirty laundry on the floor won't seem so bad.

If you made it to the end of this post.  Thank you for reading.  Thank you.


 For now this is my reality:
(and at least she makes me laugh)


One of both of us was probably crying 10 minutes before or after this picture was taken!


Monday, April 20, 2015

New life for and old writing desk

I have heard from a lot of people once they use milk paint for the first time they love it so much they want to paint everything with milk paint.  Well, that was the case for me too!  

I had been wanting to do a DIY desk for my older daughter's room for a while, but one day after my first milk paint experience, I was at my mom's house and she was getting rid of this old maple writing desk that she had gotten for a wedding gift over 40 years ago.  I wasn't crazy about the way it looked but I figured some milk paint could really transform it.  

This is what it looked like:


My mom and I decided we would do this project together so she could give it to my daughter for her 7th birthday.  (My daughter loves to write books and do her own illustrations, so this is a great gift for her...besides she has lots of toys!)

We chose Miss Mustard Seed's "kitchen scale" for the color (we added the bonding agent as well because I didn't really want the "chippy" look for this project).  My daughter's room is very light pink (Pink Kiss from Valspar - mixed by Sherwin Williams because I like their paint best) and her floor is purple and her room is very colorful, so I wasn't afraid of more color.  And the turquoise-y tone looks good with her bedding and curtains.

This is how it came out:


I sanded the whole thing after 2 coats of paint to bring out the "striations" in the paint color and then waxed it with Minwax basic furniture wax.


We got some new pinkish flower knobs from Hobby Lobby for around $3 each.


I love how it came out, and the best part is that my mom got to pass on a piece of furniture that would have otherwise been donated while I spent time and money trying to DIY a desk!

My daughter didn't waste any time decorating the bulletin board above and filling the desk with her pens and paper.  I think it's safe to say she loves her new "work space."


And yes... I am still looking around and thinking "What else can I paint with milk paint!?!"

Tuesday, April 14, 2015

New Sitting Room

Our sitting room was a room off of our kitchen/dining area that I had planned to redecorate and if you read the last post you know that I started that process and after a slow (few months) into that project I decided to do a switch-eroo and change my dining area and sitting room altogether.  It makes so much sense to me now because the sitting room was essentially just a sofa and a few chairs and tables, and our dining room is also so much better with all of the extra space.

Here is what the space looked like before (when it was our dining area):


It was good having the table and chairs "in" the kitchen with little kids, but it always felt cramped when guests came over.


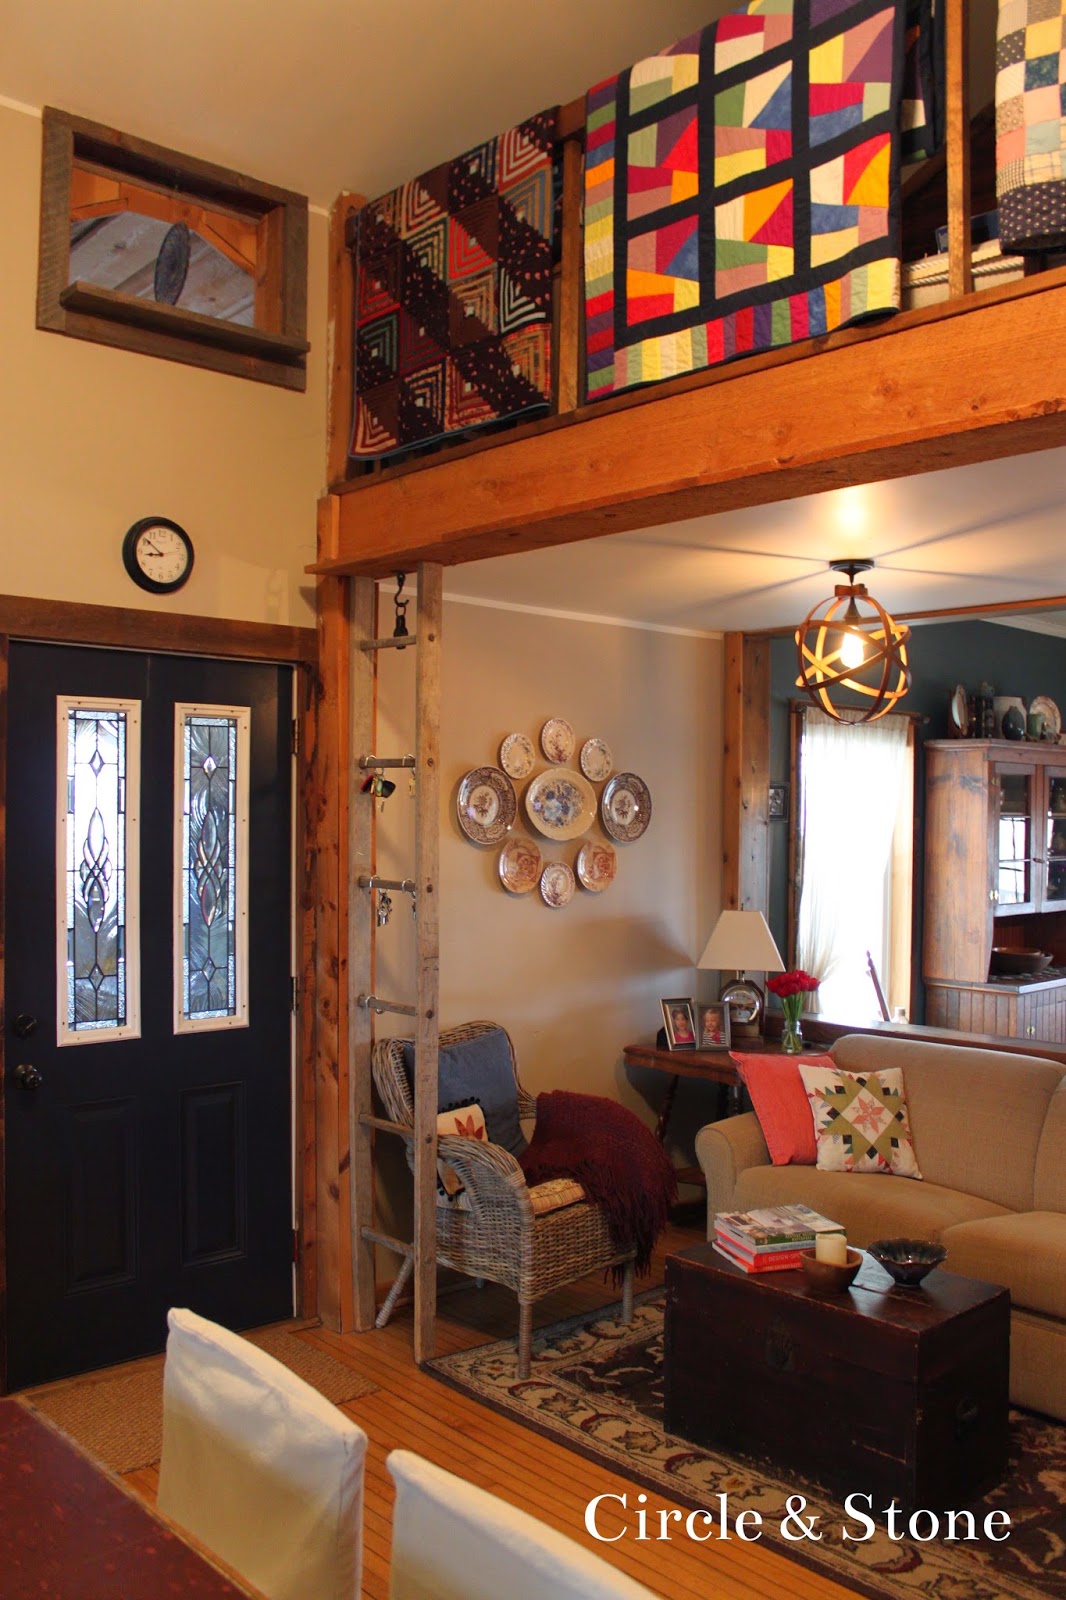
Here is what it looks like now:


To me the old sitting room never felt quite right.  Now I think I understand why - it had really high ceilings (because it was meant to be a formal dining room) so it never felt cozy.  This new sitting area is located off of our kitchen and "under" our loft space, so the ceiling is lower and the overall space is smaller.

Basically all we did was switch the furniture into this area.  I also brought in some coral/red to accent since I am trying to tie colors together in my whole house from from to room.  We used the carpet that was under our table when it was a dining room and bought a new wicker chair from Ikea.  I would eventually love to get a smaller "settee" style sofa, but for now this one works and it's comfortable.  The old wooden trunk was a $20 Craigslist find that we bought a while back and everything else we have had for some time.


The ladder to the left holds keys, etc.  I would like to take it down as soon as we can figure out how to do it without messing up all of the surrounding trim because it always seems to be in the way.


 As you can see in the photo below, I have some of my quilt collection displayed on the loft railing (which is good because they hide a bunch of clutter that has accumulated up there from another project I am working on).


This light was an inexpensive DIY idea that I got from here.  It was originally meant for the higher ceiling of the old sitting room so we had to shorten it a bit for this space.  


I have a collection of old and new transferware plates that have been on this wall since we moved in and I thought they still looked good despite changing spaces.


The area in the photo below used to be where we had our old pine hutch.  From what I understand it was where the original staircase was and when the previous owners removed it they clad the wall in barn wood.  I love that now you can actually see the wood (before it was mostly hidden by our hutch).  I plan to make a long DIY sign of some soft for the wall space next to the red cupboard.


The doors to the right of the red cupboard conceal my laundry closet.


Here's the Before and After:


Related Posts Plugin for WordPress, Blogger...